Check out more of our tutorials here!

First, we want to thank you all from the bottom of our hearts most importantly for all of your prayers but also all of the kind comments, e-mails, texts about precious Blake. They have meant so much to us.
We plan on getting back into a bit of routine now and hope to have several new items ready in our shop in the coming weeks. We have several new items that are in production right now. This morning we have a new set of pillows available and at noon we will be offering another batch of our growth charts. We started working on the pillows shortly after Christmas and had planned on offering them in mid to late January. We got a little behind on things though but they are finally ready to sell. Although we think they would be a great Valentine's gift, they also are a great sentiment year round to have! For any of you that bought our Silent Night/Holy Night Set over Christmas these would be a great replacement for those for the rest of the year. And they also would make a fun anniversary or wedding gift! The photos on our website were taken at night but I hope to take better shots to replace them today and once I do I will share them on the blog.
We are also excited to announce that we will be hosting our first ever link party on Monday! We don't plan on hosting them regularly but figured it would be fun to have one for special occasions like Valentine's Day. So, on Monday get ready to link up any Valentine's related post you have been working on and later in the week we will showcase a few of our favorites!
Okay, and now for a tutorial on how to add actions and textures in Photoshop.
This tutorial is done using Photoshop CS5.

I seem to get all of her laughing and grinning from ear to ear shots with my phone these days and they are too pixelated to do anything with. Then once I get my "real" camera out I get the "no more pictures look" =) I actually did get some of her laughing with my real camera this day but I had my shutter speed too slow and so they were all too blurry to do anything with. =(
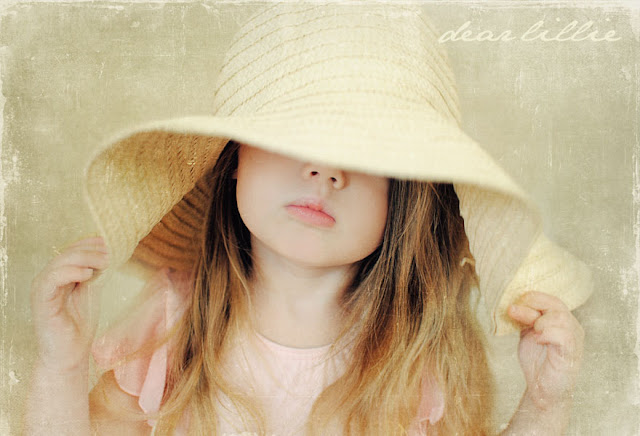
Step 1: I open the photo I want to use. For this photo I decide to clone out the stairs and make a solid background to start with. I use the clone tool on the toolbar on the left (the ninth tool down on the screenshot below) and start getting rid of the stairs.

Step 2: Once I have removed the stairs I crop my photo using the fifth tool down on the left (you can also use the second one down).

Step 3: Now that it is cropped and I have it how I want it I will run an action. For this photo (and all of the ones shown at the top of this post) I used Paint The Moon's Heist from Annie's Blessings Set. This is one of my favorites and I use it regularly. I also have to say Annie is such a pleasure to work with! If you haven't already I HIGHLY recommend checking out her site.

Step 4: For this particular photo after I run it I decide I want to adjust the settings some as it is a little too harsh on this photo.

Step 5: The first thing I do is bring the blue wash layer (you can see that highlighted in the bottom right area of the screenshot below) down to about 8% opacity.

Step 6: I play around with a few other layers just a hair and then close that up. I then click on the whole Heist layer and take the opacity down a bit. I think I took it down to around 50 or 60%.

Step 7: After staring at it a bit, I decide to crop it just a tiny bit more. (That tool is the fifth one down on the toolbar on the left).

Step 8: After that, I flatten the image and save a copy of how it looks now (I always keep the original photo too).

Step 9: Now it's time to add a texture. For this I use a Vintage Screen by Florabella. I simply place the texture over my image.

Step 10: For this particular image I used the overlay option (as seen highlighted in the bottom right area of the screen shot below). I generally play around and decide which option works best for the image I am working on.

Step 11: This is what it looks like once it has been applied.

Step 12: Now there are a lot of different ways to fix how the coloring looks on Lillie's face (yikes!) but the option I used this time was just simply the eraser tool found on the left of the screen shot below - the 11th one down. I choose a large brush option and about 50% opacity. Quite often I go even lower than that sometimes even down to about 10% and just play around until I get it right.


And there you have it!

I also really love the Whitewash Texture by Florabella which I use quite often.


I hope you all have a wonderful Friday!

0 comments:
Post a Comment